While popcorn ceilings were once a go-to for hiding imperfections and cutting down on noise, they’ve definitely lost their charm in today’s world of clean, modern home design. If your ceiling’s still rocking that bumpy texture from the ’70s or ’80s, you’ve probably been dying to get rid of it. Removing popcorn ceilings can feel like a big job, but with the right approach, it’s a pretty manageable project that can completely modernize your space—and save you from dealing with all the dust and cobwebs they tend to collect.
Test for Asbestos
First off, you’ll need to check your popcorn ceilings for asbestos. If your home was built before the mid-1980s, there’s a good chance the ceiling material contains asbestos, which is hazardous if disturbed. You can either buy a DIY test kit online or hire a professional to test a small sample. If it does test positive, it’s best to call in a professional who’s trained to remove it safely.
Get the Room Ready
After you’ve checked for and addressed any asbestos, move on to prepping the room. Removing popcorn ceilings gets messy, so use plastic drop cloths to cover your furniture, walls, and floors. This will protect everything from the dust and flakes that fall off as you scrape the ceiling. Make sure you have all the supplies for the job before you start. You’ll need a ladder, a spray bottle, a putty knife or drywall scraper, goggles, a dust mask, and a few extra drop cloths.
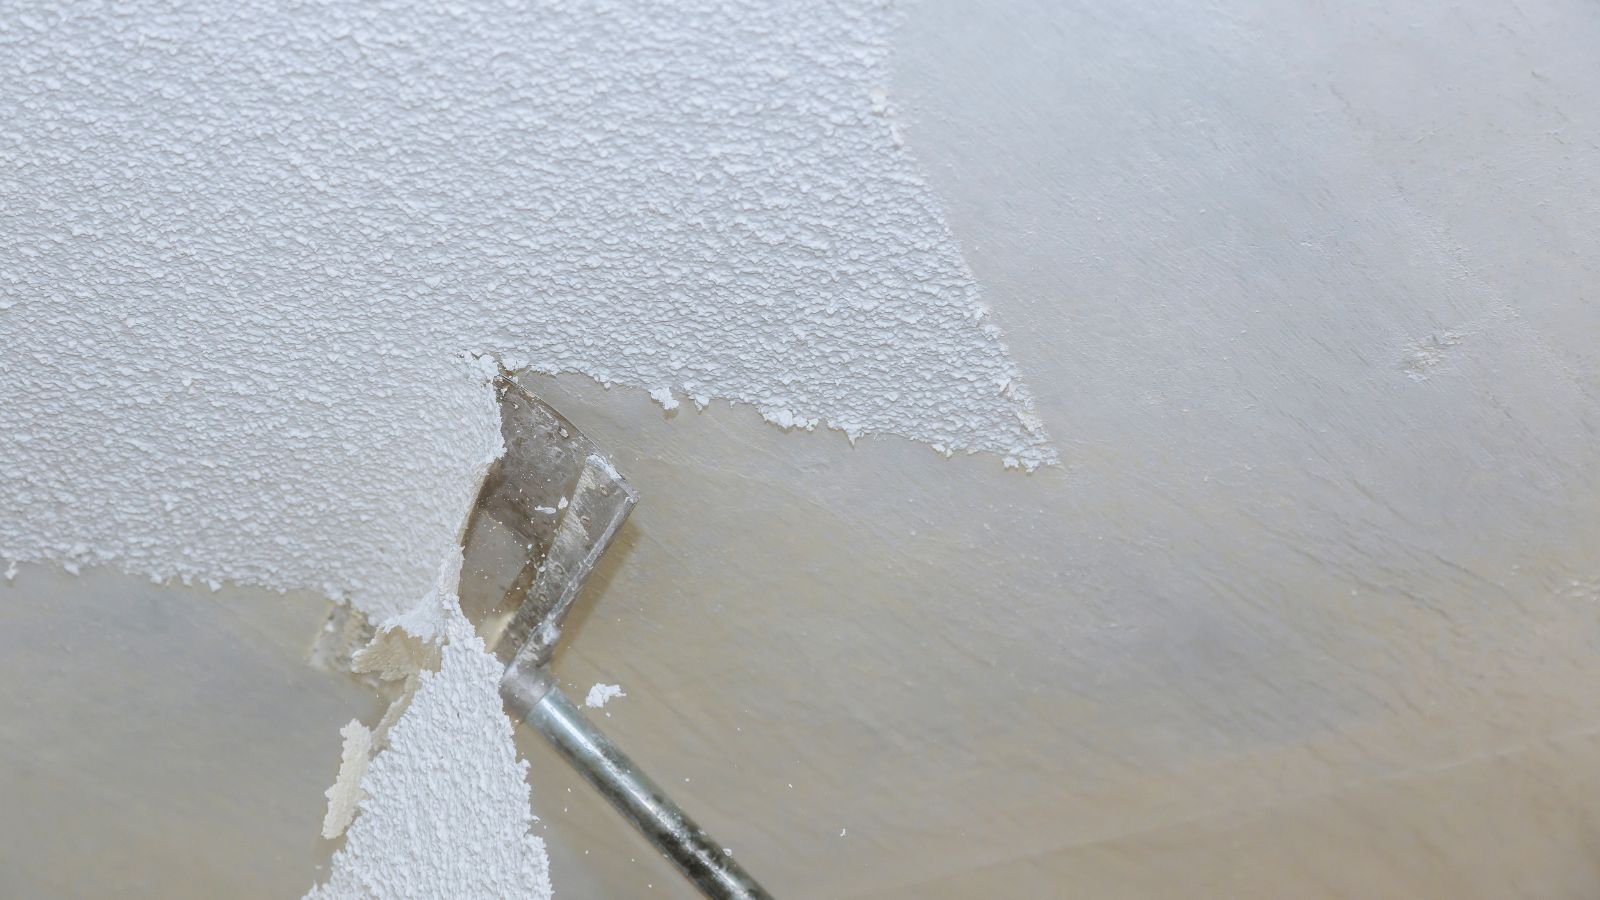
Soften the Ceiling
The popcorn texture softens when it’s wet, which makes it easier to scrape off without damaging the drywall underneath. Use a spray bottle to lightly mist a small section of the ceiling. Avoid soaking it, as this could damage the drywall. Let it sit for about 15 minutes before you start scraping.
Gently Scrape Off the Popcorn
With your putty knife or drywall scraper, gently start scraping the softened popcorn off. Work in small sections and take your time with this process. You want to avoid gouging the ceiling beneath. If you run into any stubborn patches, just re-mist them and let the water sit a bit longer.
Prime, Smooth, and Paint
Once all the popcorn is off, you’ll probably see some uneven spots or minor damage to the walls. This is the time to fill in holes or gouges with joint compound, sand it smooth, and prep the ceiling for paint. After that, apply a fresh coat of primer and paint. Now that your ceiling is clean and smooth, you’ll have a blank slate, whether you’re done for now or planning a bigger project like ceiling replacement later on.
Tips for a Smooth Removal
There are a few things to keep in mind as you remove your popcorn ceiling. If you’re not comfortable working on a ladder or handling a messy project like this, hiring a professional might be worth considering. Using a drywall primer designed specifically for ceilings can help your new paint adhere better and cover any imperfections. Keep in mind that removing popcorn ceilings can take a full weekend or more, depending on the size and condition of your ceiling, so be sure to set aside plenty of time. Finally, plan ahead for cleanup—renting a roll-off container can make disposing of all the debris much more manageable, especially for larger projects.
Conclusion
Getting rid of popcorn ceilings can really open up your space and give it a fresh, modern feel. Plus, smooth ceilings are so much easier to clean and keep looking good. With a little prep and patience, you’ll be amazed at how much brighter and more updated your room feels.