Bad lighting can turn a morning routine into a guessing game, shadows across the mirror, uneven makeup, or razor nicks that could have been avoided. Bathroom vanity lighting isn’t just about visibility: it’s about creating a functional workspace that delivers accurate color rendering and even illumination. A well-lit vanity makes grooming tasks easier, enhances safety, and can elevate the entire aesthetic of the bathroom. Whether someone’s updating a cramped powder room or a spacious primary bath, the right fixtures can transform the space without a full remodel. This guide walks through practical vanity lighting options, placement strategies, and installation considerations for homeowners ready to upgrade their bathrooms in 2026.
Key Takeaways
- Proper bathroom vanity light placement at 40 to 45 inches from the floor eliminates harsh shadows and provides even face illumination for grooming tasks.
- Wall-mounted sconces flanking the mirror remain the most effective vanity lighting solution, delivering lateral light that minimizes shadows and creates balanced coverage.
- Choose vanity light fixtures with a Color Rendering Index (CRI) of 90 or higher to ensure accurate color perception for makeup application and grooming precision.
- LED strip lights and backlit mirrors offer modern, shadowless lighting solutions that simplify bathroom design and work particularly well in smaller spaces.
- Select bathroom vanity light finishes like brushed nickel or matte black that resist water spots and corrosion better than polished brass in humid environments.
- Always verify local electrical codes and ensure fixtures near water sources have proper wet-location ratings and GFCI protection before installation.
Why Vanity Lighting Matters for Your Bathroom
Vanity lighting directly impacts daily tasks that require precision, shaving, applying makeup, skincare routines, and even checking for ticks after a hike. Overhead ceiling fixtures alone cast shadows downward, leaving the face poorly lit and creating dark zones around the jawline and under the eyes. This makes color matching nearly impossible and can result in uneven grooming.
Proper vanity lighting addresses this by positioning light sources at eye level or slightly above, typically 40 to 45 inches from the floor to the fixture center for wall-mounted sconces. This placement eliminates harsh shadows and provides even coverage across the face. For tasks requiring accurate color perception, like makeup application, fixtures with a Color Rendering Index (CRI) of 90 or higher are essential. Lower CRI values distort how colors appear, which explains why makeup looks different once someone steps outside.
Beyond function, vanity lighting sets the room’s tone. A dated single-bulb bar light can make an otherwise updated bathroom feel stuck in the 1990s. Modern fixtures with clean lines, integrated LED technology, or decorative glass shades can serve as focal points while delivering the lumens needed for daily tasks. The National Electrical Code (NEC) requires GFCI protection for bathroom receptacles, and while lighting circuits have different requirements, it’s worth consulting local codes before any electrical work, especially in wet or damp locations near showers and tubs.
Modern Sconce Lighting for a Designer Touch
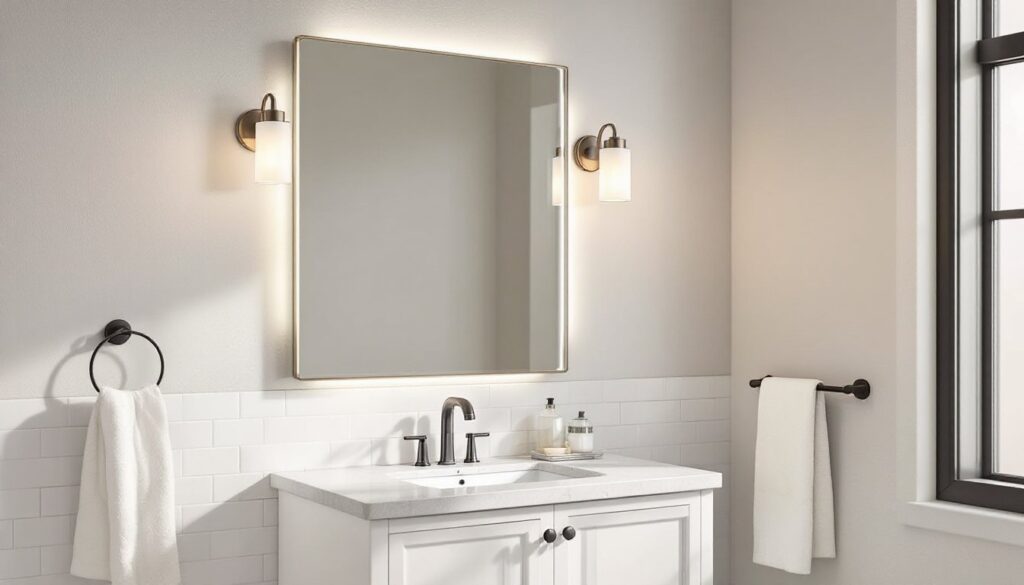
Wall-mounted sconces flanking a mirror remain one of the most effective vanity lighting setups. They deliver lateral lighting that minimizes shadows and creates balanced illumination. Sconces work particularly well in bathrooms with limited wall space above the mirror or where the ceiling height doesn’t accommodate pendant fixtures.
Vertical vs. Horizontal Mounting: Most sconces can be installed either way, but vertical orientation typically provides better light spread for face-level tasks. Horizontal sconces work when ceiling height is limited or when someone wants a wider light distribution. The key is positioning the light source itself, usually the bulb or diffuser, at that 40-to-45-inch sweet spot.
Globe and Cylinder Styles: Exposed-bulb globe sconces offer a minimalist, modern look and work well in bathrooms with contemporary or industrial design. Frosted glass globes diffuse light evenly, while clear glass creates more dramatic shadows and highlights, better for ambiance than task lighting. Cylinder sconces direct light up and down, which can highlight wall texture or architectural details while still providing adequate face lighting when positioned correctly.
Material and Finish Considerations: Brushed nickel, matte black, and aged brass are trending in 2026, but the finish should complement existing fixtures, faucets, cabinet hardware, towel bars. Mixing metals intentionally can work, but it requires a deliberate approach rather than mismatched leftovers. Glass, ceramic, and metal shades each perform differently: metal directs light more precisely, while glass and ceramic diffuse it.
For installation, sconces require an electrical box rated for fixture weight. Typical sconces weigh 2 to 5 pounds each, but heavier fixtures may need additional blocking behind the drywall. If the existing box is a flimsy plastic retrofit unit, upgrade to a metal box anchored to a stud. Always turn off power at the breaker before working on any lighting circuit.
Overhead and Pendant Vanity Lighting Options
Linear fixtures mounted above the mirror, often called bath bars, remain a practical choice, especially for single-sink vanities or narrow bathrooms where side-mounted sconces aren’t feasible. Modern LED bath bars are a far cry from the Hollywood-style bulb strips of decades past. Today’s versions offer integrated LED arrays, dimmable drivers, and slim profiles that don’t overwhelm smaller spaces.
Sizing for the Mirror and Vanity: A common guideline is to choose a fixture that’s roughly 75% the width of the mirror or vanity, whichever is narrower. For a 36-inch vanity, a 24-to-30-inch bath bar provides balanced coverage without visual overhang. Mount the fixture 75 to 80 inches from the floor, which positions it above head height for most users while keeping the light source close enough to the mirror for effective task lighting.
Pendant Fixtures Over the Vanity: Pendants add visual interest and work well in bathrooms with higher ceilings, 9 feet or more. They’re especially effective over freestanding vanities or furniture-style cabinets where a traditional bath bar might feel too formal. Use two pendants for double-sink vanities, positioned over each sink basin rather than centered on the mirror. This creates symmetry and ensures each user has dedicated lighting.
Pendants do require careful planning. The bottom of the fixture should hang 30 to 36 inches above the countertop, low enough to provide useful light but high enough to avoid head bumps. Glass or open-frame pendants work best: solid metal shades direct light downward only, which can reintroduce the shadow problem overhead fixtures are known for.
One practical note: if there’s no existing electrical box where a pendant or overhead fixture is planned, running new wire may require opening the ceiling or wall. In multi-story homes, this can mean accessing the space from above. It’s often easier to tie into an existing switch leg than to run an entirely new circuit.
LED Strip and Backlit Mirror Solutions
Integrated lighting, particularly LED strip lights and backlit mirrors, has become more accessible and easier to install in recent years. These solutions deliver diffuse, shadowless light that’s ideal for task-heavy bathrooms.
Backlit Mirrors: These mirrors have LED strips embedded behind or around the perimeter, creating a soft halo effect. They’re available as all-in-one units with integrated defoggers, touch controls, and even color temperature adjustment (3000K warm white to 5000K daylight). Installation is straightforward if there’s already an electrical box behind the mirror location: many models simply hang on a French cleat and plug into a standard outlet, though hardwired versions look cleaner.
Backlit mirrors eliminate the need for separate sconces or overhead fixtures in smaller bathrooms, reducing clutter and simplifying the design. For larger vanities, they can supplement sconces by filling in gaps and providing ambient lighting.
LED Strip Lighting: Flexible LED strips can be mounted under wall-mounted mirrors, inside medicine cabinets, or along the top edge of a mirror frame. They’re available in 12V or 24V systems, requiring a transformer (driver) that’s often tucked inside the vanity cabinet or behind the mirror. Adhesive-backed strips make installation quick, but for a permanent setup, use aluminum channels to house the strips, this improves heat dissipation and provides a cleaner look with diffuser lenses that hide individual LED diodes.
Color Temperature Matters: For vanity lighting, 3000K to 4000K is the sweet spot. Lower temps (2700K) skew too warm and yellow, while higher temps (5000K+) can feel clinical. Some LED systems offer tunable white, allowing users to adjust color temp based on time of day or task.
Safety Note: LED drivers and transformers must be rated for damp or wet locations depending on proximity to water sources. The NEC classifies zones around tubs and showers with specific requirements, so check local codes before installing low-voltage lighting near these areas.
Choosing the Right Finish and Style
Finish and style choices should balance aesthetics with durability, especially in bathrooms, where humidity and moisture exposure can degrade certain materials over time.
Finish Durability: Brushed nickel and chrome resist water spots and corrosion better than polished brass or oil-rubbed bronze, which can patina or tarnish in humid environments. Matte black fixtures are on-trend but show water spots easily unless wiped down regularly. Powder-coated finishes generally hold up better than spray paint or lacquer, which can chip or peel with moisture exposure.
Matching vs. Mixing Metals: Matching all fixtures, lighting, faucets, cabinet pulls, creates a cohesive look and is the safer design choice for DIYers. Mixing metals works when there’s a dominant finish (e.g., brushed nickel for 70% of fixtures) and an accent metal (matte black for 30%). Avoid using more than two metal finishes in a single bathroom unless it’s a large space with distinct zones.
Style Alignment: A farmhouse-style vanity with a modern geometric sconce creates visual dissonance. Fixture style should complement the vanity, tile, and overall bathroom design. Traditional bathrooms pair well with frosted glass shades and classic silhouettes. Contemporary spaces benefit from clean lines, exposed bulbs, or integrated LED designs. Transitional styles, blending traditional and modern, offer flexibility and are forgiving for homeowners unsure of their design direction.
Bulb Type and Wattage: Even LED-integrated fixtures eventually need replacement, so consider longevity and availability. Fixtures using standard E26 or E12 bases offer more flexibility than proprietary LED modules. For non-integrated fixtures, LED bulbs in the 60W-equivalent range (around 800 lumens per bulb) provide sufficient light without glare. Dimmable bulbs paired with a dimmer switch add versatility, but make sure the dimmer is LED-compatible, older incandescent dimmers can cause flickering.
Placement and Installation Tips for Optimal Lighting
Placement determines whether a fixture performs well or becomes decorative dead weight. Getting the height, spacing, and wiring right the first time avoids costly rework.
Sconce Spacing: For double-sink vanities, mount sconces centered on each sink, not on the outer edges of the mirror. Typical spacing is 36 to 40 inches apart for sinks on 60-to-72-inch vanities. Mounting sconces too close creates overlap and hot spots: too far apart leaves dark zones in the center.
Measuring and Marking: Use a laser level or a 4-foot level to mark sconce locations. Measure from the floor up to the desired height (40 to 45 inches to center), then mark the wall. Check for studs with a stud finder, mounting directly to a stud is ideal, but if the location doesn’t align, use drywall anchors rated for the fixture weight. Toggle bolts or molly bolts work for hollow walls: avoid plastic anchors for anything over 2 pounds.
Rough-In Considerations: If there’s no existing electrical box, this is where the project gets real. Running new wire from a nearby switch or junction box may require fishing cable through walls, which is doable but tedious. A 12/2 or 14/2 NM-B (Romex) cable is standard for lighting circuits. For new construction or gut renovations, plan electrical rough-in before drywall goes up. For retrofit work, cable-pulling fish tape and a flexible drill bit make the job easier.
Electrical Box Height: For overhead fixtures, the box should be centered above the mirror, typically 78 to 80 inches from the floor. This keeps the fixture in proportion with standard 8-foot ceilings. For higher ceilings, adjust accordingly but avoid going so high that bulb changes require a stepladder.
GFCI and Wet Location Ratings: Fixtures within 3 feet horizontally and 8 feet vertically of a tub or shower need wet or damp location ratings. GFCI protection may also be required depending on local code. When in doubt, consult a licensed electrician, particularly for circuits near water.
Installation Order: Always install the mounting bracket first, confirm it’s level, then attach the fixture. Tighten wire nuts securely (a loose connection can cause flickering or arcing), tuck wires neatly into the box, and make sure no bare copper is exposed. Use the provided screws to secure the fixture to the bracket, don’t overtighten, as this can crack glass or ceramic components.
Testing: Flip the breaker back on and test the fixture before finishing any drywall patching or painting. If the light doesn’t turn on, check wire connections and confirm the switch is functioning. A non-contact voltage tester can verify whether power is reaching the box.
Conclusion
Upgrading vanity lighting improves daily function, enhances safety, and transforms the look of a bathroom without the cost and disruption of a full remodel. Whether someone opts for modern sconces, sleek LED strips, or a backlit mirror, the key is thoughtful placement, proper electrical work, and choosing fixtures that match both the space and the task. With the right tools, a bit of planning, and attention to code requirements, most homeowners can tackle vanity lighting upgrades themselves, and enjoy better light for years to come.