Choosing shower tile isn’t just about aesthetics, it’s about durability, maintenance, and creating a space that holds up to daily moisture exposure. The right tile can make a cramped shower feel open, add architectural interest to a builder-grade bathroom, or deliver that spa vibe without the resort price tag. But with thousands of tile options spanning materials, sizes, finishes, and patterns, the decision can quickly become overwhelming. This guide breaks down proven tile ideas that balance style, function, and real-world installation considerations, helping homeowners navigate everything from classic subway layouts to bold geometric statements.
Key Takeaways
- Porcelain and ceramic tiles are the top choices for bathrooms because they resist water absorption and are available in countless designs at affordable prices.
- Choosing the right bathroom tile ideas requires balancing style, durability, and maintenance—subway tiles offer timeless appeal and affordability, while large-format tiles create a modern seamless look with fewer grout lines.
- Natural stone tiles like marble and slate deliver luxury spa aesthetics but demand regular sealing every 6–12 months and cost 3–5 times more than porcelain alternatives.
- Matte and textured shower tiles provide better slip resistance than glossy finishes, making them safer for wet conditions and high-traffic bathrooms.
- Budget-conscious homeowners can achieve a high-end look by using marble-look porcelain, accent walls with premium tiles, or shopping tile closeout sales for 50–70% discounts.
- Proper substrate preparation, waterproofing membranes, and correct slope installation are critical—mistakes during tile installation lead to leaks and costly repairs that could have been prevented.
Why Shower Tile Selection Matters for Your Bathroom
Tile choice directly impacts water resistance, slip safety, cleaning effort, and long-term durability. Unlike wall paint or countertops, shower tile is expensive and labor-intensive to replace, making the initial selection critical.
Porcelain and ceramic tiles dominate residential showers because they’re non-porous, affordable, and available in nearly limitless designs. Porcelain rates slightly higher for water absorption resistance (less than 0.5%), making it the better pick for high-moisture areas. Natural stone, marble, slate, travertine, delivers luxury but requires sealing every 6–12 months to prevent staining and water penetration.
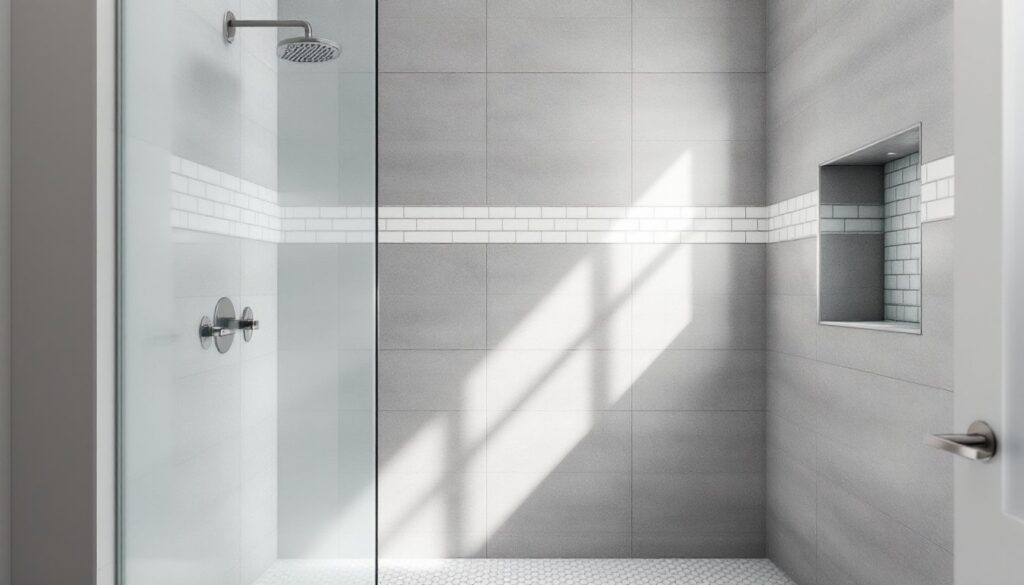
Tile size affects both aesthetics and installation complexity. Smaller tiles (under 4×4 inches) require more grout lines, which means more joints to seal and clean but better slip resistance underfoot. Larger formats (12×24 inches and up) minimize grout maintenance and create a sleek, contemporary look, though they demand flatter substrate prep and can be trickier to slope properly on shower floors.
Finish matters, too. Matte and textured tiles offer better traction in wet conditions, while glossy finishes reflect light and make small showers feel larger, but they show water spots and soap scum faster. For shower floors specifically, look for tiles with a Coefficient of Friction (COF) rating of 0.60 or higher to meet slip-resistance standards, especially if elderly or mobility-challenged individuals use the space.
Timeless Subway Tile Patterns That Never Go Out of Style
Subway tile, those classic 3×6-inch rectangles, remains the workhorse of shower design for good reason. It’s affordable (often $1–$5 per square foot), widely available, and pairs with virtually any decor style from farmhouse to modern.
The traditional running bond (brick-like offset) installation is the safest choice, but varying the layout adds personality without switching materials. A vertical stack elongates walls and suits contemporary spaces, while a herringbone pattern introduces movement and visual texture, though it increases labor costs by 20–30% due to the additional cuts and planning required.
Color and finish variations keep subway tile relevant. White beveled subway tile with a glossy finish maximizes light reflection in small showers, while matte gray or black subway tile creates dramatic contrast, especially when paired with white grout for a grid effect. For a softer look, consider subway tiles in sage green, pale blue, or terracotta, colors that add warmth without overwhelming the space.
One often-overlooked detail: grout color changes everything. White grout on white tile creates a seamless, clean look but shows mildew faster. Contrasting dark grout on light tile highlights the pattern and hides staining but can make the space feel busier. For best longevity, use epoxy grout on shower walls, it resists staining and mold better than standard cement-based grout and doesn’t require sealing, though it costs about double and has a shorter working time during application.
Bold and Dramatic: Geometric and Patterned Shower Tiles
For homeowners looking beyond neutral simplicity, geometric and patterned tiles offer instant personality. These tiles work best as accent walls, a single focal wall behind a showerhead or across a niche, rather than covering every surface, which can feel visually chaotic.
Hexagon tiles (usually 2–4 inches across) bring retro charm or modern edge depending on color choice. White hex tiles with black grout nod to vintage bathrooms, while large-format black or navy hexagons read contemporary. Installation requires careful alignment and typically takes 25–30% longer than standard square tiles.
Moroccan-inspired zellige or encaustic-look tiles deliver rich pattern and color variation. True zellige (handmade glazed terracotta) offers authentic texture and color irregularity but comes with a premium price, often $15–$40 per square foot. Porcelain versions mimic the look for $5–$12 per square foot and offer better water resistance.
Chevron and herringbone patterns in contrasting colors (navy and white, charcoal and cream) create strong linear movement that can visually expand narrow shower stalls. But, these patterns demand precise cutting and layout, not an ideal first tile project unless the installer has prior experience.
One critical note: busy patterns can date quickly. What feels bold and fresh today may look tired in seven years. If resale is a concern, limit dramatic patterns to easily replaceable accent areas and keep the majority of the shower in neutral, classic tile that appeals to broader tastes.
Natural Stone Tiles for a Spa-Like Retreat
Natural stone transforms a standard shower into a high-end retreat, but it requires more maintenance than ceramic or porcelain. Understanding the trade-offs helps homeowners make informed choices.
Marble remains the luxury standard, Carrara, Calacatta, and Statuario varieties offer classic white backgrounds with gray or gold veining. Marble is softer than porcelain (Mohs hardness of 3–4 vs. 7 for porcelain), making it more prone to scratching and etching from acidic cleaners. It must be sealed before grouting and resealed every 6–12 months. Honed (matte) marble hides etching better than polished but shows water spots more readily.
Slate delivers earthy texture and natural slip resistance, making it especially popular for shower floors. Its layered structure creates inherent variation in tone, grays, greens, purples, and golds. Slate is denser than marble and requires less frequent sealing (annually), but its uneven surface can be harder to clean thoroughly.
Travertine offers warm, neutral tones (beige, tan, ivory) with characteristic pitting that creates an Old World feel. The porous surface requires diligent sealing to prevent water absorption and mildew growth within the stone itself. Many installers fill the natural pits before installation to reduce cleaning headaches.
For natural stone showers, budget an extra 15–20% for material waste due to breakage and the need to match veining or color variation. Stone also weighs significantly more than ceramic, ensure the shower substrate (cement board or mortar bed) is properly reinforced to handle the load, especially on upper floors.
Modern Large-Format Tiles for Seamless Elegance
Large-format tiles, anything 12×24 inches or larger, have surged in popularity for their ability to create clean, minimalist aesthetics with fewer grout lines to maintain. Sizes like 12×24 inches, 24×48 inches, or even 36×36 inches are now common in contemporary shower designs.
The primary advantage: reduced grout lines mean less scrubbing, less mildew potential, and a more seamless appearance. This works especially well for replicating the look of natural stone slabs or concrete without the cost. Porcelain planks in wood-look finishes (6×48 inches or 8×48 inches) bring warmth and texture while maintaining full water resistance.
But, large-format tile installation isn’t beginner-friendly. These tiles demand perfectly flat substrates, any dips or humps telegraph through and can cause cracking or lippage (edges that don’t align). The installer will need to use large-notch trowels (at least 1/2 inch) and back-butter each tile to ensure full mortar coverage and prevent voids that can trap water.
Large tiles also weigh more. A 24×48-inch porcelain tile can weigh 25–30 pounds, making solo installation difficult. Most pros recommend a second pair of hands or mechanical lifters for anything over 18 inches.
For shower floors, large-format tiles can be problematic unless properly sloped (1/4 inch per foot minimum toward the drain). Some installers prefer smaller tiles or mosaics on floors because the increased grout lines allow for better slope contouring and drainage.
Budget-Friendly Shower Tile Ideas That Look High-End
Achieving a custom look on a modest budget comes down to strategic splurges and smart substitutions.
Porcelain that mimics natural materials has become remarkably convincing. Marble-look porcelain tiles deliver the veining and color variation of real stone at a fraction of the cost ($3–$8 per square foot vs. $15–$40 for genuine marble) with zero sealing requirements. Wood-look porcelain planks offer warmth without the moisture concerns of real wood.
Accent walls or stripes let homeowners incorporate pricier tiles without blowing the budget. Use high-end tile, handmade zellige, textured stone, or metallic accents, on one feature wall or as a horizontal band at eye level, then surround it with affordable field tile in a complementary neutral.
Subway tile remains unbeatable for value, especially white or light gray ceramic versions that often cost $1–$3 per square foot. Upgrading the grout to a contrasting color or using a specialty layout (herringbone, vertical stack) adds visual interest without increasing material costs significantly.
DIY installation saves 40–60% on labor costs, but tiling a shower is not a beginner project. It requires waterproofing membrane application (RedGard, Kerdi, or similar), proper mortar selection, and careful slope management on floors. Mistakes lead to leaks, mold, and costly tear-outs. Homeowners comfortable with tile work might tackle walls and hire a pro for the pan and floor, a reasonable compromise that controls costs while protecting the most critical waterproofing areas.
Shop for tile during closeout sales or check local suppliers for discontinued stock, often perfectly good tile at 50–70% off simply because the manufacturer changed patterns. Just buy 15–20% extra for cuts and future repairs.
Conclusion
Shower tile sets the tone for the entire bathroom, balancing aesthetics with the hard realities of moisture, maintenance, and installation complexity. Whether leaning toward timeless subway patterns, dramatic stone, or sleek large-format designs, the best choice aligns with both the homeowner’s style and their willingness to maintain it. Proper substrate prep, quality waterproofing, and realistic skill assessment make the difference between a shower that performs beautifully for decades and one that becomes a cautionary tale.